
When it comes to concrete pouring, whether for a residential patio or a large commercial slab, the success of the project depends heavily on proper site preparation. Skipping or rushing this step can lead to costly mistakes like cracking, sinking, or poor drainage.
As a Gold Coast concrete contractor, I’ll walk you through the essential steps needed for a professional concrete pour.
Table of Contents
Step 1: Clear and Level the Site
Step 2: Mark and Install Formwork
Step 3: Prepare the Subbase
Step 4: Add a Vapour Barrier (Optional)
Step 5: Install Reinforcement
Step 6: Final Inspection and Adjustments
Step 7: Pouring and Finishing the Concrete
Step 1: Clear and Level the Site
Clearing and levelling the site is the foundation of any successful Concrete Pouring process. A well-prepared site ensures the concrete sets evenly and reduces the risk of future structural issues.
Remove debris and vegetation:
Clear away any rocks, roots, or plants that could interfere with the Concrete Pouring. If necessary, use a shovel, rake, or hire earthmoving equipment for larger areas.
Excavate the topsoil:
Remove the top layer of soil to reach the subgrade. This layer should be stable and compact to support the weight of the Concrete Pouring.
Ensure proper grading:
If the Concrete Pouring is outdoors, grade the site to allow for proper drainage. A slight slope of 1-2% directs water away from the slab, preventing pooling and erosion.
Compact the soil:
Use a plate compactor or hand tamper to compress the subgrade, reducing the risk of settling and uneven Concrete Pouring thickness.
Step 2: Mark and Install Formwork
Once the site is prepared, marking and setting up formwork provides a clear boundary for the Concrete Pouring process.
Mark the perimeter:
Use wooden stakes and string lines to outline the exact shape and dimensions of the slab for Concrete Pouring.
Check for accuracy:
Measure diagonals to ensure square corners and adjust if necessary for irregular shapes before Concrete Pouring.
Install formwork:
Use timber or metal boards secured with stakes to contain the concrete. Ensure the boards are strong enough to withstand the weight and pressure of the wet concrete during Concrete Pouring.
Verify levels:
Use a spirit level to check that the formwork is level and correctly positioned to avoid uneven concrete thickness when Concrete Pouring begins.
Apply release agent:
Coat the inside of the formwork with oil or a release agent to prevent the concrete from sticking, making removal easier after Concrete Pouring.
Step 3: Prepare the Subbase
A stable subbase is essential for Concrete Pouring to prevent cracking and uneven settling.
Choose the right material:
A gravel base (typically 75mm-150mm thick) is commonly used for stability and drainage in Concrete Pouring.
Spread the material evenly:
Distribute the gravel across the site in a uniform layer to create a stable foundation for Concrete Pouring.
Compact the subbase:
Use a plate compactor to firmly pack down the gravel, ensuring there are no loose areas that could cause settling during Concrete Pouring.
Check the depth:
Confirm that the compacted subbase reaches the required thickness for Concrete Pouring, making adjustments as necessary.
Step 4: Add a Vapour Barrier (Optional)
A vapour barrier helps prevent moisture from seeping into the concrete during Concrete Pouring, improving its durability in certain conditions.
Use plastic sheeting:
A polyethylene sheet is commonly used for moisture control during Concrete Pouring.
Ensure full coverage:
Extend the barrier across the entire area, overlapping seams by at least 150mm before Concrete Pouring.
Seal the edges:
Use tape or sealant to secure overlapping sections and prevent moisture from penetrating before Concrete Pouring.
Consider climate factors:
If the site has high groundwater levels or is indoors, a vapour barrier is particularly beneficial for Concrete Pouring.
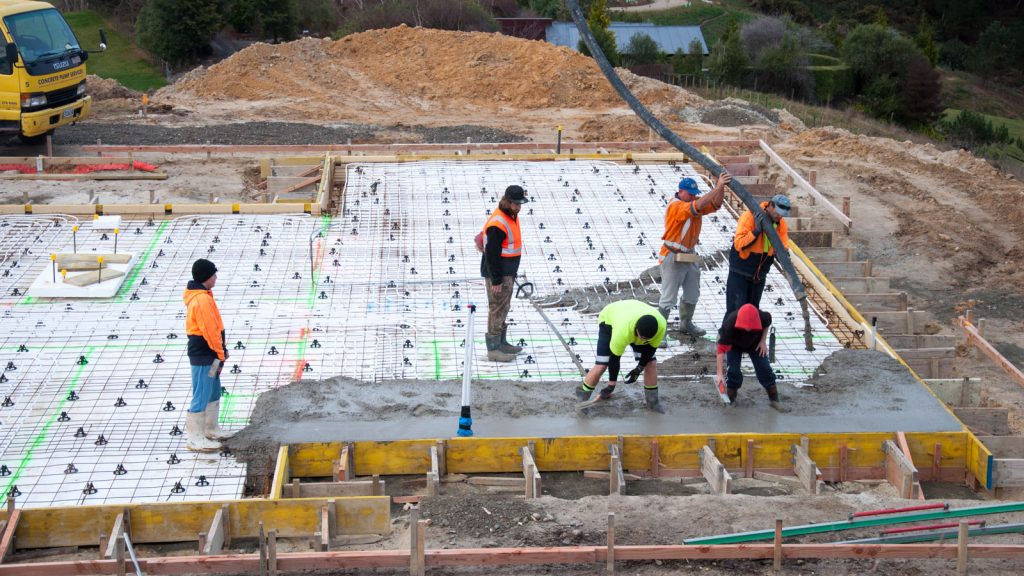
Step 5: Install Reinforcement
Reinforcement is a crucial step in Concrete Pouring, particularly for high load areas like driveways or commercial slabs. Steel reinforcement mesh or rebar is used to strengthen the concrete, reducing the likelihood of cracking under pressure. The reinforcement is typically placed on small spacers so that it sits within the middle of the concrete slab, ensuring even distribution of strength.
Choose the right reinforcement:
Use steel mesh or rebar depending on the load-bearing requirements for Concrete Pouring.
Position the reinforcement correctly:
Place mesh or bars on small spacers to ensure they sit within the middle of the slab during Concrete Pouring.
Secure the reinforcement:
Tie rebar intersections with wire to keep them in place during Concrete Pouring.
Ensure adequate coverage:
Maintain at least 50mm of concrete cover around reinforcement during Concrete Pouring to protect against rust and deterioration.
Step 6: Final Inspection and Adjustments
Before pouring concrete, a thorough check of the site helps prevent costly mistakes.
Confirm the formwork alignment:
Ensure it is straight, level, and securely fastened.
Check reinforcement placement:
Ensure it is evenly spaced and properly supported.
Inspect the subbase:
Verify it is well compacted and at the correct depth.
Make last minute adjustments:
Fix any loose sections of formwork or reinforcement before proceeding.
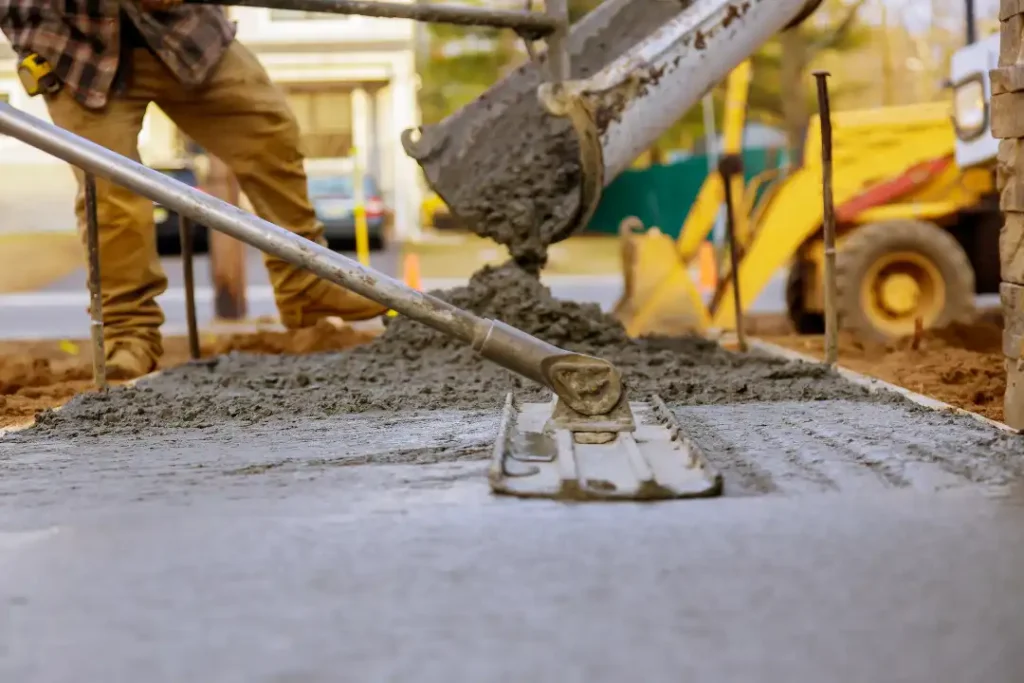
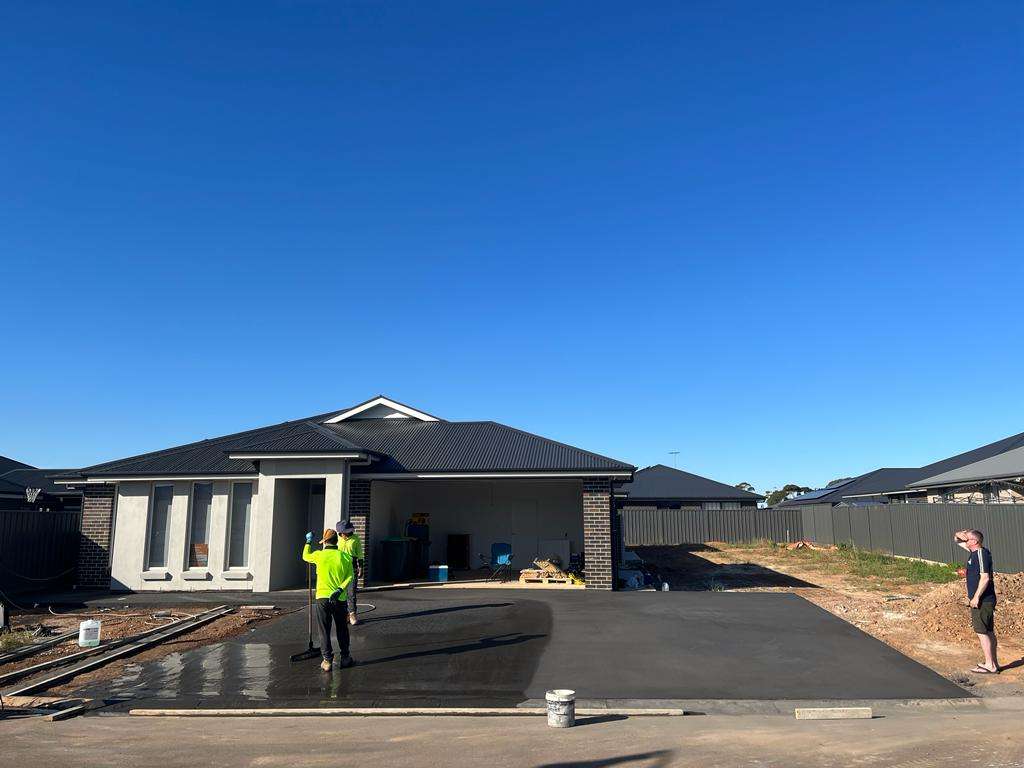
Step 7: Pouring and Finishing the Concrete
The final step is pouring and finishing the concrete to achieve a smooth and durable surface.
Prepare for the pour:
Decide whether to mix on site or use a concrete truck for larger projects.
Distribute the concrete evenly:
Use a shovel or rake to spread the concrete within the formwork.
Level the surface:
A screed board helps to remove excess concrete and create a flat surface.
Smooth the finish:
Use a bull float to eliminate imperfections and bring finer particles to the surface.
Add control joints:
If applicable, insert control joints every 3 metres to minimise cracking.
Allow curing time:
Let the concrete set for at least 24-48 hours before removing formwork, and allow a full curing period of around 28 days for maximum strength.
Why Choose Our Concrete Services
- Experience in Both Residential and Commercial Projects: With extensive experience in various types of projects, from patios to large commercial slabs, we bring expertise to every job.
- Reliable and Professional Service: We pride ourselves on delivering reliable services on time and within budget, ensuring your project runs smoothly.
- High Quality Materials: We use only the best materials and reinforcement techniques, ensuring your concrete will stand the test of time.
- Personalised Solutions: Every project is unique, and we tailor our services to meet your specific needs, ensuring optimal results for each job.
- Free, No Obligation Quotes: Contact our team today for a free quote and see how we can help bring your project to life.
Reach out today to discuss your concrete pouring project, or request a free quote from our expert team!
FAQs
Before pouring concrete, it’s essential to prepare the ground properly to ensure a strong and stable foundation. Start by clearing the area of any debris, vegetation, or loose soil, then excavate to the required depth. Next, compact the soil thoroughly to prevent future settling, and add a layer of gravel to improve drainage and stability. Finally, install formwork to define the shape of the slab and reinforce it if necessary before pouring the concrete. Taking the time to do this properly will help prevent cracks and uneven surfaces in the long run.
Gravel plays a crucial role beneath a concrete slab because it improves drainage, prevents water buildup, and provides a stable base. Without it, moisture could accumulate under the slab, leading to cracks and shifting over time. It also helps distribute the weight of the concrete more evenly, reducing the risk of sinking or settling. By adding a well-compacted layer of gravel, you create a solid foundation that will keep your concrete strong and long-lasting.
Formwork is a temporary mould that holds the wet concrete in place while it sets and hardens. It can be made from timber, metal, or plastic and is designed to shape the concrete according to your desired dimensions. Good formwork ensures clean edges, proper alignment, and a smooth finish, preventing the concrete from spreading beyond the intended area. It’s an essential part of the pouring process, helping to create a durable and professional-looking slab.
Reinforcement is often recommended for concrete slabs, especially for areas that will bear heavy loads, such as driveways or patios. Steel mesh or rebar helps strengthen the slab, reducing the risk of cracks and increasing its durability over time. While smaller or non-load-bearing slabs may not always need reinforcement, it’s a good idea to include it for added stability and longevity. Investing in reinforcement now can save you from costly repairs in the future.
A concrete driveway should typically be at least 100mm thick to support the weight of regular vehicles. If you expect heavier loads, such as trucks or caravans, increasing the thickness to 150mm or more is advisable. Reinforcing the slab with steel mesh can also add strength and prevent cracking. Ensuring the correct thickness will help your driveway last longer and withstand daily use without issues.
If the base isn’t properly compacted before pouring concrete, you risk serious problems down the track. A poorly compacted base can lead to uneven settling, causing cracks, sinking, or even structural failure over time. Water can also accumulate in soft spots, leading to erosion and weakening the slab. Taking the time to compact the base properly ensures a strong, stable foundation that will support your concrete for years to come.
It’s best to wait at least seven days before driving on your new concrete driveway, though full strength is typically reached after 28 days. During this time, the concrete continues to cure and gain strength, so avoiding heavy loads too soon helps prevent cracks and damage. If the weather is particularly hot or wet, curing may take a little longer, so keeping the slab moist and protected can help ensure the best results. Being patient now will help your driveway stay strong and durable for years to come.